Tag Archive for algebra

Taking Notes on the iPad – Part 1

I have a student in one of my classes that loves learning with technology.  He is always asking me what software and hardware I am using.   The other day I turned the tables on him and became very interested in the applications he was using on his iPad to take notes in my Algebra class.   He said he was using SmartNote.   I have tried several note taking apps on my iPad, but I have not tried that one …yet!

I decided I would start a blog series comparing several of the note taking applications that I have tried on my iPad, along with trying out a few more that have been recommended by others.

In these articles I will focus on applications that allow students (and anyone) to take hand-written notes with a pen, such as the Pogo Sketch (that is what I use).

The first app I started using is called Sundry Notes .   There is a free version available in the iTunes store, as well as a paid version that does not have any ads.

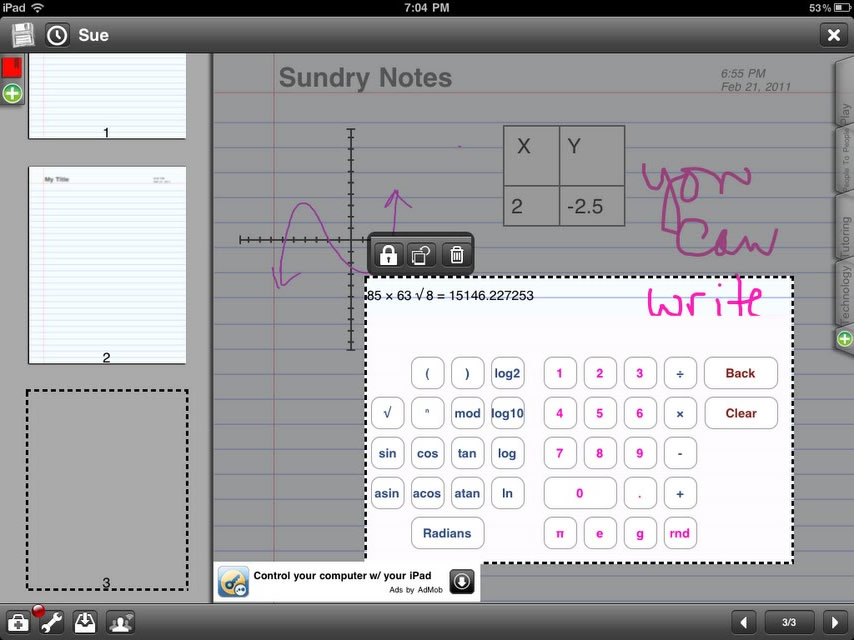
I was immediately impressed with the fact that Sundry notes has its own calculator built in, along with several menus of math symbols you can add to any note!  In the screenshot below you can see I was able to start graphing, post a calculator, a table, and handwrite, all on the same page!  The app will also allow you to post an audio note and embed photos as well!

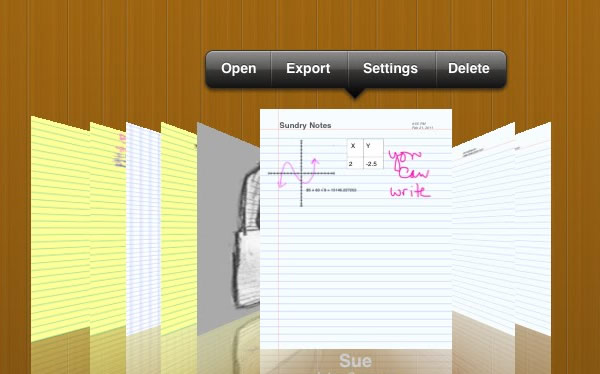
The notes are fairly easy to organize and you have several “views” to choose from.   Below you can see the “preview” mode, where you can see what is written on any note in any stack of notes.

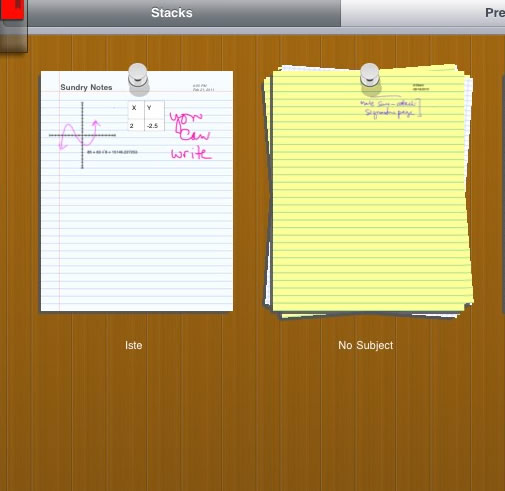
You can also place notes in a stack, which would be the same as placing them in the same folder or notebook.  In this view you can see the different stacks of notes you have created.

The main drawback that keeps me from using Sundry Notes all of the time is that the pages of notes are very small, so if you know you want to take  lot of notes, you will be creating a lot of pages!    After writing on the page, you can shrink down the writing, but it is a bit cumbersome if you are quickly taking  notes for a class.

Next time I will review Penultimate, which is another app I found soon after getting my iPad.

To be continued…


Students Learning -AND having fun!

Today in class I passed out the Mobis!

I have had my students sitting in groups since the first day of class, but today I thought I would add more interaction and have them contribute to the board notes.   There were 8 groups, and I have 4 Mobis.    After putting a problem on the board (computer screen, writing with the Mobi and using software called Interwrite Workspace), I would give 4 groups each a Mobi and have someone from the group post their group’s solution.  At first no one wanted to try it, but after a short time, they were all wanting to have a chance to write with the Mobi!

Some of the students had more fun than others – drawing pictures and fooling around on the screen, but it was OK because they were ENGAGED!

The first four groups would hand off their Mobi to the other four groups and we would work another problem.


I have to admit, some students were able to write using the Mobi better than I can, and I have practiced longer!  You have to look at the screen while writing on the Mobi  – a little challenging at first.   For their first day, they did a great job!

They have really embraced the technology I use in class, starting with having 2 students take notes with Livescribe pens to share with the class on the website.

In a week or two I will introduce the clickers!


Off To A Great Semester With Technology!

A new semester has begun and I have added a few new ways to help my students succeed.

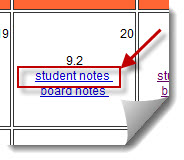
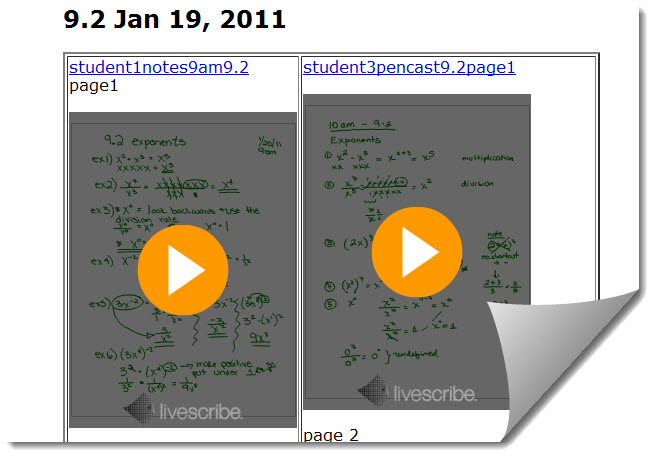
  1. I borrowed my colleague’s idea to have 2 students take notes during every class using a Livescribe smartpen.  I then upload the notes to their class website, and post a link  in the calendar on the day the notes were taken.

I created a webpage to house the daily notes for each chapter, starting with our first chapter:  Chapter 9

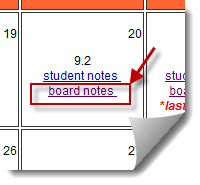
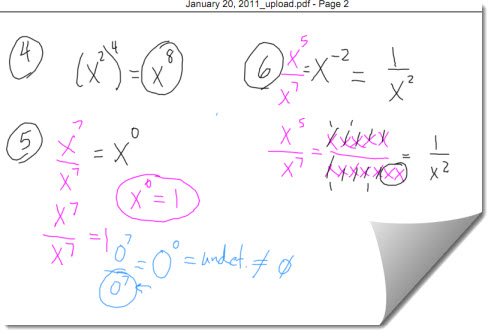
2.  I use a Mobi (from eInstruction) to present the lesson from anywhere in the room.   An especially nice feature of the Mobi software, called Workspace, is that I can save the board notes and export them to a PDF file.  I place on link in the calendar to the board lesson on the day the lesson was given.

*to see the actual board notes, you must go to the calendar and click on “board notes”, since they are an attached PDF file, I cannot link to it here.

3.  The students use an online program to do their homework, which sends me a screen shot when they need help on a particular problem.  Instead of trying to type back a response to them, I fully explain their solution using a Livescribe smartpen.  I then send them the link to the pencast, and I also created a webpage to house all solutions to student homework questions.

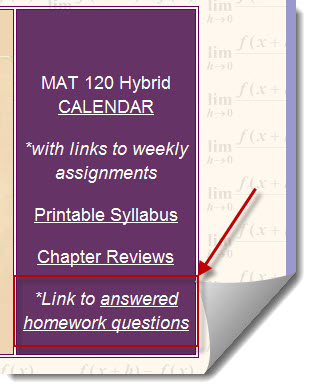
*here is the link to the page that contains all the homework solutions

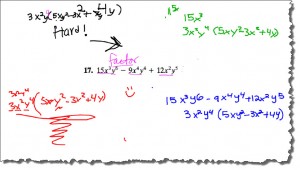
Here is one of the solutions I wrote to my students just today:

This is just the first week of class, and the students have shown a positive reaction to these extra support features I have included on my website for them.   I look forward to seeing how the semester progresses!
*To see more of my college website go to:  Glascoe College Website .  I built the website using Dreamweaver.
*All screenshots were taken using TechSmith Snagit


Japanese Multiplication – How Does it Work?

I have come across some fun math problems (yes, math CAN be fun!) through the internet and friends.  Here is a video of Japanese Multiplication.  First watch the video, and then see if you can figure out how they are multiplying  before you read my explanation below!

—————————————————————-

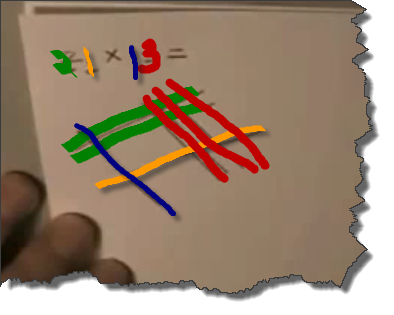
Well, did you figure it out?  Let’s take a closer look at the first example:

Now take it apart:

  • The first set of lines, the green ones in my image above, represent 2 sets of 10 , or 20
  • The second region with one line, which is orange in my image, represents 1 set of 1
  • Together these sets of lines, read top to bottom,  represent 2×10 + 1×1  which is expanded notation for 21

Let’s look at the next set of lines that were drawn perpendicular to these lines:

  • The first region that contains the 1 blue line represents 1 set of 10 or 1×10
  • The second set of lines that were drawn, the three red lines, represent 3 sets of 1
  • Together these 4 lines, read left to right, represent 1×10+3×1 = 13 in expanded notation.

Now for the tricky part!

Those of you who have ever FOIL-ed in Algebra will recognize the process of distributing the values by “First, Outer, Inner, Last”

Here is a quick Algebra example to remind you
(x+3)(2x+5) =

First = x * 2x = 2x^2
Outer= x*5 = 5x
Inner = 3*2x = 6x
Last = 3*5 = 15

Then,  2x^2 + 5x +6x +15 = 2x^2 + 11x +15 (the Outer and Inner were “like” terms, so could be added together)

Now back to the arithmetic.   If you look at the product 21×13 by separating out each factor by its place values, you have:

(20 + 1)(10 + 3)  and now you can FOIL out the values, just like in the Algebra problem!

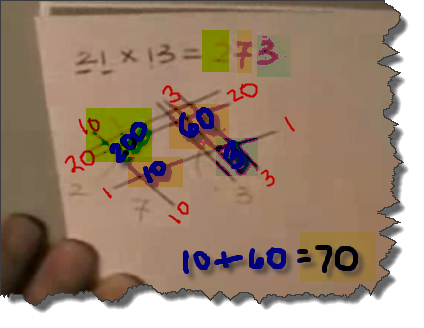
First = 20×10 = 200
Outer =  20×3 = 60
Inner = 1×10 = 10
Last =  1×3 = 3

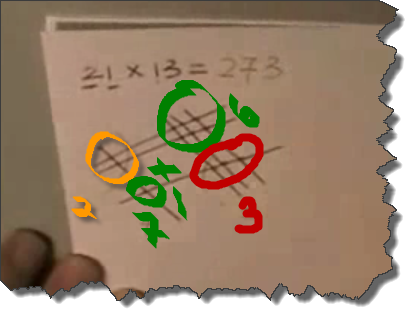
The 200 is represented by the 2 sets of crossing lines circled in yellow on the image above- that location on the paper represents the hundreds place value, so having a 2 in the hundreds location represents 2×100 = 200.  In the video a 2 is placed as the first digit of the product, which will be the hundreds place.

Next:

The 60 is represented by the 6 sets of crossing lines in green on the top right
The 10 is represented by the 1 set of crossing lines in green on the bottom left

Together the 60+10 gives 70.  In the video, the areas circled in green on the image above both represent the tens place value, so they are adding up the 6 crossed marks and the 1 crossed mark to get 7 sets in the tens place, or 7×10=70.    They then place a 7 to the right of the 2 in the product (placing it in the tens place)

Finally:

The 3 is represented by the 3 crossed marks in the lower right (circled in red on the image above).   This area of the paper represents the ones place, so we have 3×1 = 3.   They then place a 3 to the right of the 7 in the product, placing the 3 in the ones place.

This gives the final product of 200+60+10+3 or 200+70+3 = 273

~Now look at the second product in the video and see if you can figure out how it works!


My Customer-Story Video for Livescribe

I was asked by Livescribe if I would give my testimonial as a college instructor using the Livescribe pen for my math classes.   I had so much fun making the video with the team!

Amazing how they can shrink 2 hours of  “discussion” (with many retakes I might add!) into a minute and a half of produced video!

They interviewed 7 people in different professions to show how each of us enhances our work with the help of our Livescribe smartpen.

To see all 7 videos, go to the Livescribe Home Page and click on my photo on the bottom of the page.  (OK, I share the photo with three other people, but I made the home page!)

I still own my original 1 GB Pulse and now the new Echo smartpen, and I am so thankful for having such great technology to teach with!  I am also finding great ways to use my smarpens in  everyday life, too!

Here is my Livescribe Story posted on YouTube:


Clip to Evernote


An Inspirational Teacher

I wanted to take a moment and share a little bit about an individual who has been a HUGE inspiration for me on my journey to teaching a more interactive math class that includes technology and making learning fun for students (and teachers!).

(These ‘images’ of Maria are taken from her blog)

Her name is Maria H. Anderson and she writes a wonderful blog called Teaching College Math.

I met her in person last year when she came to my college to give an all day Saturday workshop.  It was incredible!  She inspired me to start writing a blog to share my own resources and ideas.

Maria is a college math instructor at Muskegon Community College (in Michigan). and wears many other hats as well, including CEO of Andersen Algebra Consulting LLC, an educational consulting business, through which she does consulting work for textbook companies, educational software companies, and speaking engagements at conferences and workshops.

She recently wrote Algebra Activities, a 1000-page Instructor resource binder of activities and teaching guides for algebra :

As if she wasn’t REALLY busy already, did I mention she is working on her Ph.D. in Higher Education Leadership ?!  Truly an amazing and inspirational woman and math professor!

I want to share one of her recent blog posts on WolframAlpha because I really thought it was exceptional:

Shifting Assessment in a World with WolframAlpha

I love using Wolfram Alpha not only for math, but any type of search engine (there is even some humor involved – type in “what is the meaning of life?”).

The next generation is growing up in a world where information is available at the touch of button on their computer, their iPad, and even their smartphone!   There are websites out there that can do anything they need, and answer any math problem they can think of (or that we give them!).  Her article has some great ideas about ways to change the focus of what we want our students to learn in this new technology, and information-rich environment.

Try out WolframAlpha (after reading her article) and see how amazing it is for yourself!

Clip to Evernote


Teaching with the Mobi

Here is a video of me teaching with the Mobi (recorded by my students)

Here is a link if you want to see it IN YouTube:

http://www.youtube.com/watch?v=Y_ftSlZ-UVA

I recorded this as part of the interview process for becoming a Certified National Instructor for eInstructor.  I was accepted into the program and the training is in MD next week!  I can’t wait to learn even more about all their products and how to use them to enhance my own classroom and online experiences for my students!


Learning to use Camtasia (by TechSmith) – a great way to record my desktop!

I just downloaded Camtasia for both Mac and Windows.  I happened to be on my Mac when a student emailed me with a homework question, so I thought I would respond and try out Camtasia for Mac at the same time!   Here is the result.

I still need to learn to edit the video and add cool comments and arrows and all the other great stuff I “know” Camtasia can do.   But I am willing to go ahead and share my very first screencast with you to show you how easy it is to get started!

Here is the link:   http://www.screencast.com/t/MjQzMTA5ZGQt

I finally have my OWN domain so that now I CAN embed Flash!  * added May 10,2010


Using InterwriteWorkspace to record a lesson

I wanted to show my students a comparison of graphing a line to graphing a parabola.  I quickly made a video using a Mobi and the Interwrite Workspace, both by eInstruction.  The Interwrite Workspace allowed me to write on graph paper (using the pen on the Mobi) and to record everything I was writing and saying with their “record” tool!    Not only was it a great introduction, but now that it is posted on the web, my students can go back and review it anytime they need to.

The WordPress blog won’t let me embed videos, so here is a link to the video


Teaching Rational Inequalities with pencasts

I am creating my online lesson for next week tonight.  Thought I would share a few of the @Livescribe pencasts I made

Here is a more advanced problem:

The students really enjoy being able to watch and hear me work through an example
the same way I would work them in class and also to be able to pause and watch the video
as many times as they need to!
I love my Livescribe Pulse Smart Pen.  My husband and kids gave it to me
last year for Mother’s day!  Wonder what I will get this year?!  🙂
 

Analytics Plugin created by - Powered by Womens Sunglasses and Human Services Degree.